In this article we’ll be going step-by-step through the process of getting you up-and-running with YOLO v5 and creating your own bounding boxes on your Windows machine, though if you prefer you can jump right to the Colab where the work has been done for you.Basically, read on if you want to learn how to install and run YOLO for object detection on your own Windows machine, or jump to the Colab if you just want to see what it does.
Sections
- What Is YOLO?
- Setting Things Up
- Installing YOLO v5
- Installing Python
- Installing CUDA
- Installing PyTorch
- Creating Bounding Boxes With YOLO v5 vs On Your Webcam
- Creating Bounding Boxes With YOLO v5 vs On An Image
- Creating Bounding Boxes With YOLO v5 vs On A YouTube Video
- YOLO v5 Models, Sizes & Performance
- Video Walkthrough With Ivan Goncharov
- The Google Colab
For those of you that may have arrived here after seeing YOLO mentioned and perhaps encountered a bounding box or two and thought they looked interesting (that’s how I got started down this path) let’s first take a quick look at what we’re playing with.Click here to just right to the coding.
What Is YOLO?
YOLO stands for You Only Look Once and is an extremely fast object detection framework using a single convolutional network. The speed of YOLO over other object detection systems is that it looks at the whole image at once as opposed to sweeping it pixel-by-pixel.YOLO does this by breaking an image into a grid, and then each section of the grid is classified and localized (i.e. the objects and structures are established) after which the bounding boxes are predicted.Predicting the bounding boxes is done with regression-based algorithms, as opposed to a classification-based one.Classification-based algorithms are completed in two steps (selecting the Region Of Interest (ROI)) and then applying the convolutional neural network (CNN) to the regions selected in step one to detect the object.YOLO’s regression algorithm predicts the bounding boxes for the whole image at once, which is what makes it dramatically faster.Now that we have that out of the way, let’s dive in.
Setting Things Up
You will need to install (instructions below):
- Yolo v5 Repository
- Python 3.8 (or later)
- PyTorch
- CUDA
Installing YOLO v5
The first thing we want to do is install YOLO v5. You’ll get this from the GitHub repository here.To get the files:
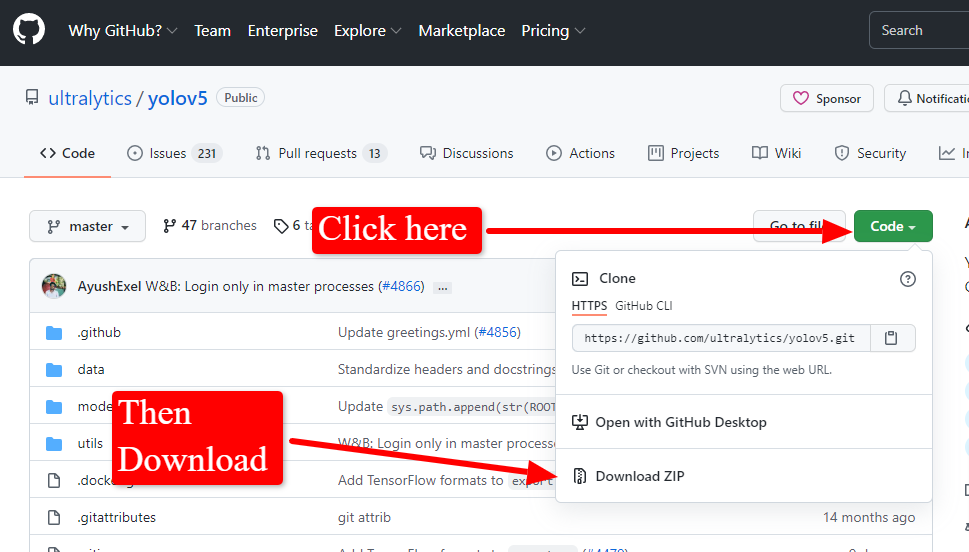
Once the file is downloaded, just extract it to the location you want to keep it, and carry on. We’ll come back to YOLO in a moment.
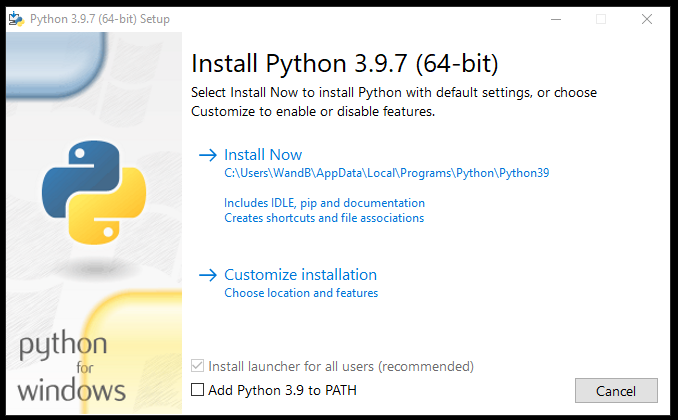
Installing Python
Next we need Python. We’ll begin by downloading the latest version here.If you have a previous version installed you’ll leave the “Add Python x.x to PATH” unchecked, as we’ll address than manually shortly:
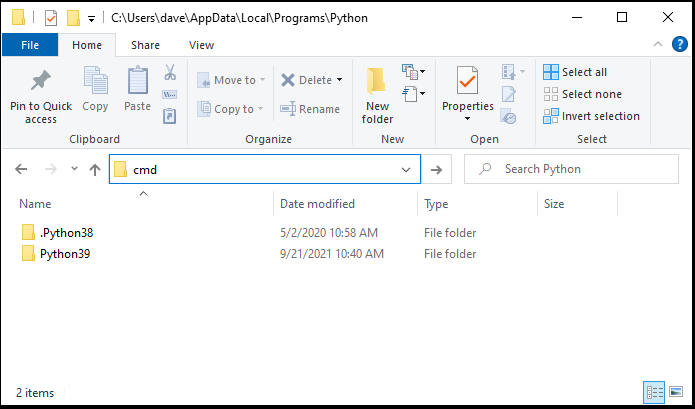
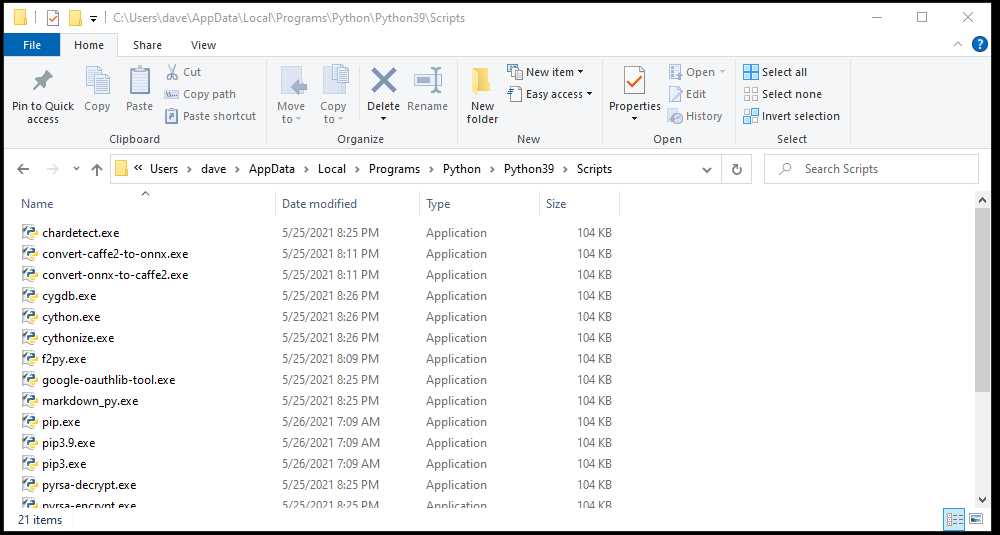
A quick check in my folders and we’ll see I had a previous version of Python installed on my machine:
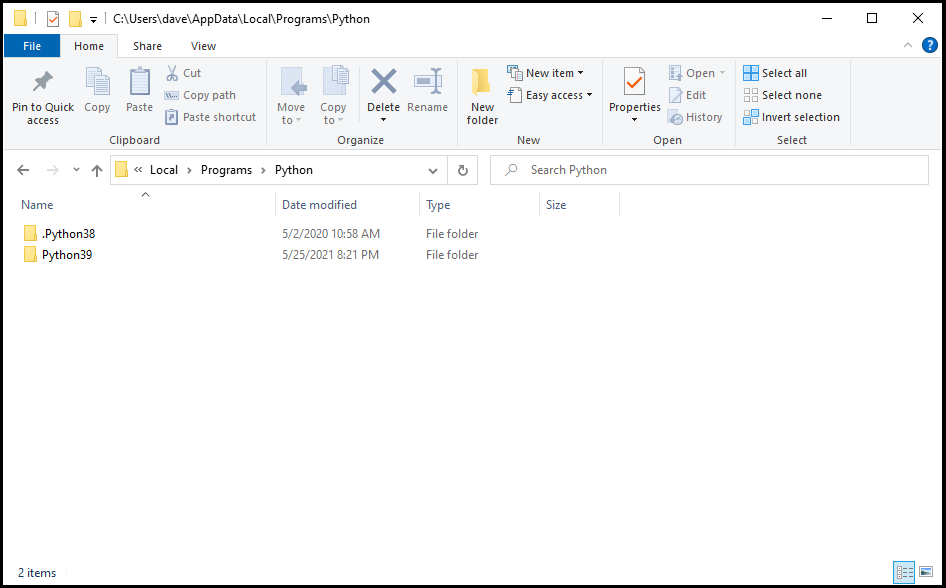
While 3.8 would work fine, let’s get it running on 3.9 which will also take us through the process you’ll need to follow to move from pre-3.8 versions.As we’ll be using the Windows Console, let’s start by checking which version it’s accessing:
Checking Which Version Of Python Console Is Accessing
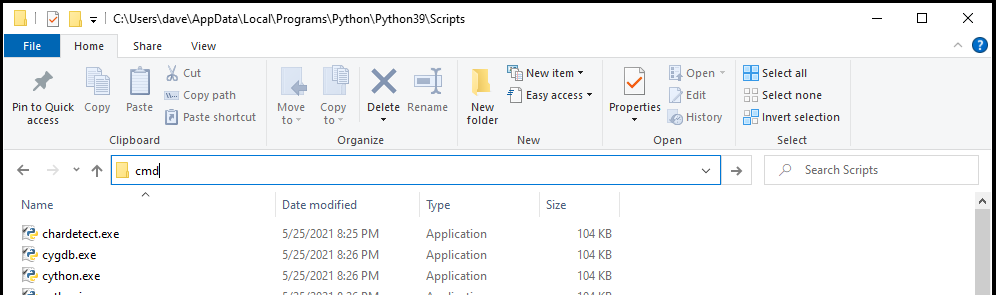
The easiest way to do this is to go to the Python directory in Windows Explorer and type cmd into the address bar
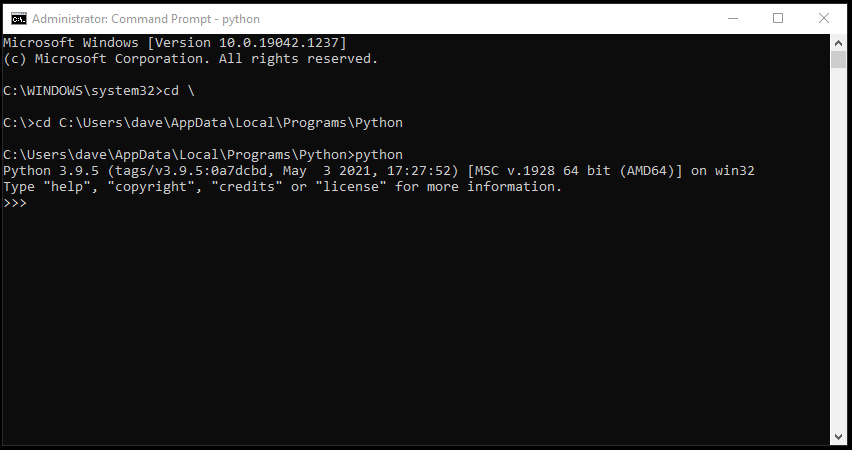
Then click Enter and simply type:
python
and you’ll get the version number you’re using:
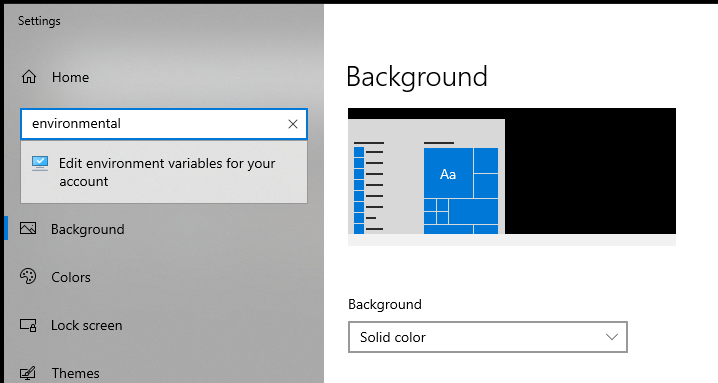
If you’re running an older version of Python you’ll now head to edit your environmental variables in your Settings:
And edit the Path variable to reference the latest version of Python:
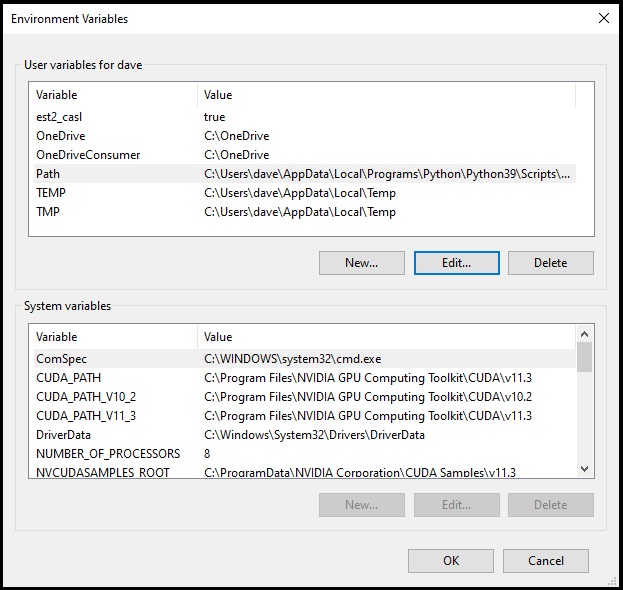
You’ll now want to double-check your settings in the console as we did earlier, and then move on to:
Installing CUDA
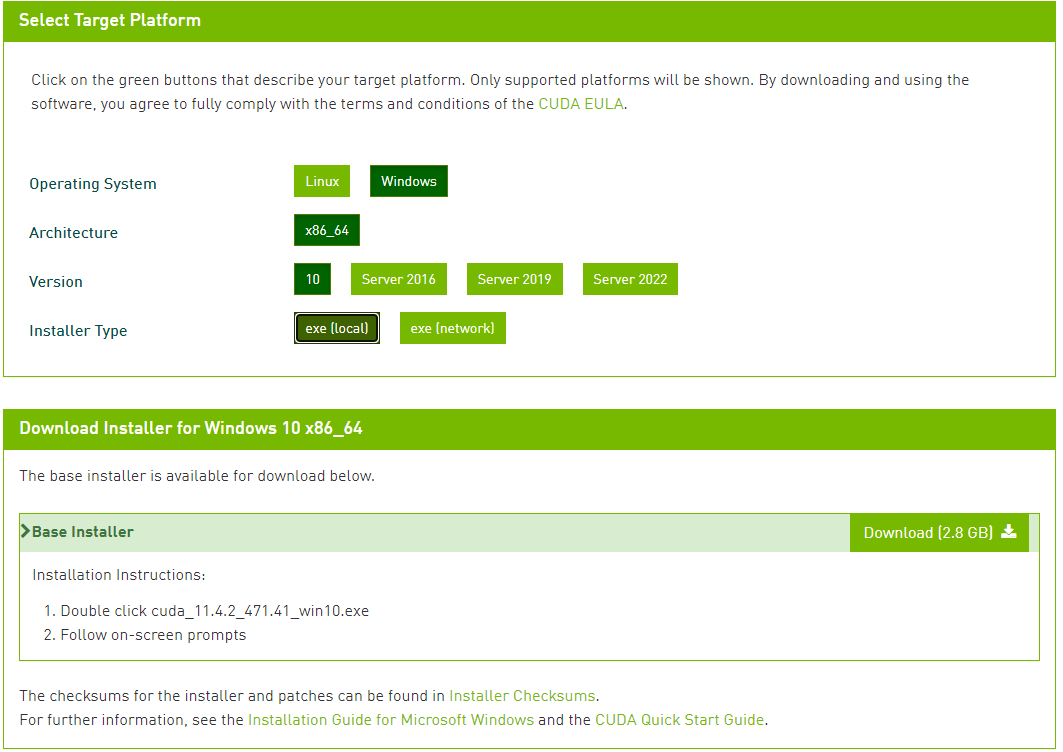
Time to install CUDA.CUDA is NVIDIAs parallel computing platform for their GPUs. Basically, it allows your machine to run parts of the computation in parallel which is where a lot of the speed comes from. I’m pretty sure we wouldn’t be talking about realtime bounding boxes at all, if it wasn’t for this feature.Head over to NVIDIAs CUDA Toolkit page and select the options that apply to your machine. For example, mine are:
After it’s downloaded we launch the file and install:
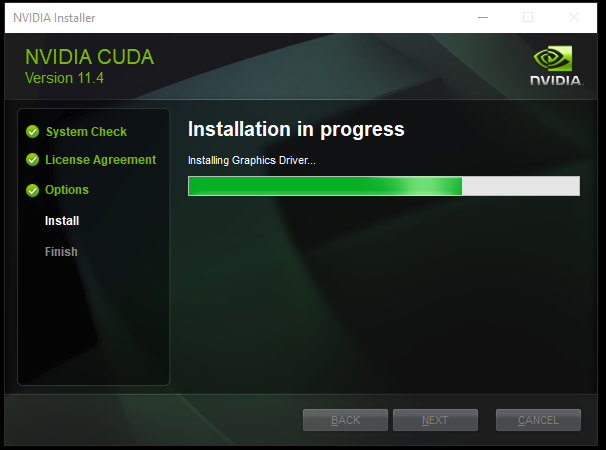
You may need to reboot. After that we’ll install PyTorch.
Installing PyTorch
PyTorch is the most popular machine learning frameworks to define models, run inference (what we’ll be doing here) and perform training.And when I write “most popular” I mean:
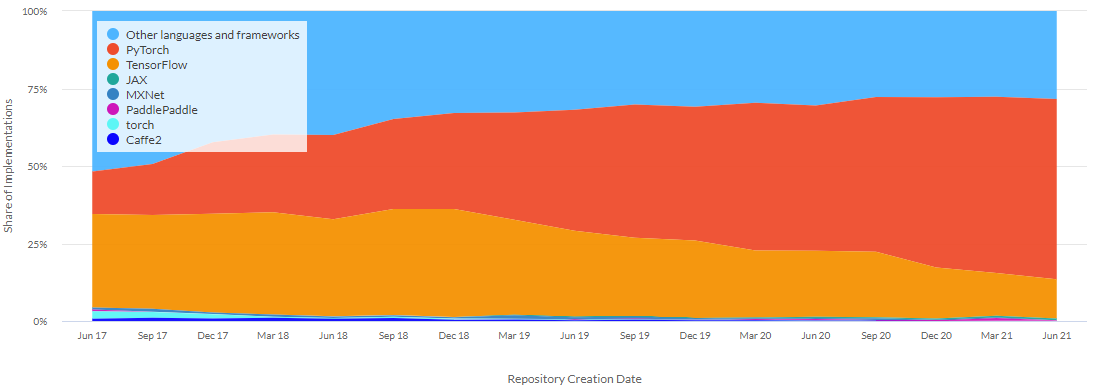
Source: Papers With Code TrendsPyTorch, like most machine learning frameworks, runs calculations and inference on the GPU which is significantly faster than running them on the CPU. But you have to set it up correctly, so let’s do that:
Installing PyTorch As A Python Module
From the PyTorch Getting Started Page you will select the options that apply to you.For example, mine are:
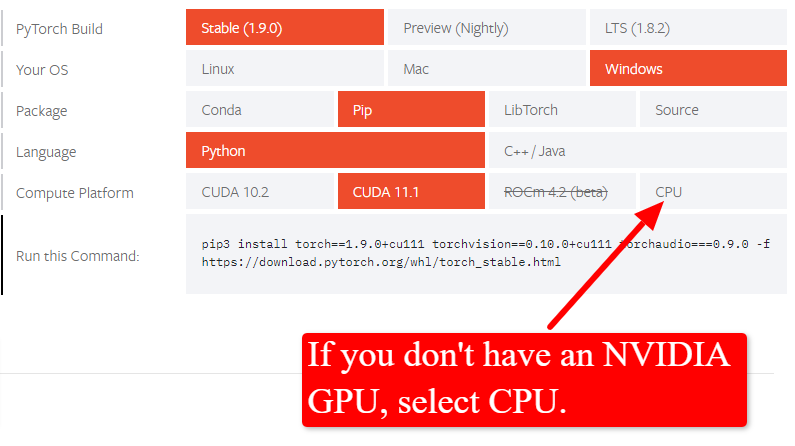
Now we’ll copy the code we’re given:

And open the Python Scripts folder in Windows Explore:
Next type cmd in the address bar there:
Which will open the console to that folder where you can paste the code from PyTorch.My code (for example) was:
pip3 install torch==1.9.1+cu111 torchvision==0.10.1+cu111 torchaudio===0.9.1 -f https://download.pytorch.org/whl/torch_stable.html
My console shows a couple “already installed” notices, and a couple errors, but yours shouldn’t if this is your first install, and we can ignore them.

Now we need to install some additional modules that are found in the YOLO v5 requirements.To install these simply open the YOLO v5 folder that contains the unzipped files and enter cmd into the address bar again and Click Enter.

From the Console we’ll now run the following to install the required modules:
pip install -r requirements.txt

Note: You’ll likely get a big red error message during this stage, telling you to install Visual Studio. If you get this, you can download it here.The error is related to PyCOCOTools.After installing Visual Studio we’ll install PyCOCOTools with the following, again in the YOLO folder via the console.
pip install git+https://github.com/philferriere/cocoapi.git#subdirectory=PythonAPI
And now we run the above noted requirements with:
pip install -r requirements.txt
Just for good measure.
Creating Bounding Boxes With YOLO v5 On Your Webcam
And now the moment you’ve been waiting for, it’s time to actually get things up-and-running and create some bounding boxes using your webcam.Type the following code into the console in your YOLO v5 folder:
python detect.py --source 0

If you multiple webcams or applications that spoof them you may need to change this number. If you only have one, the source will be 0 as in the example code.And after a few moments:
If you want to stop it simply click inside the open window.
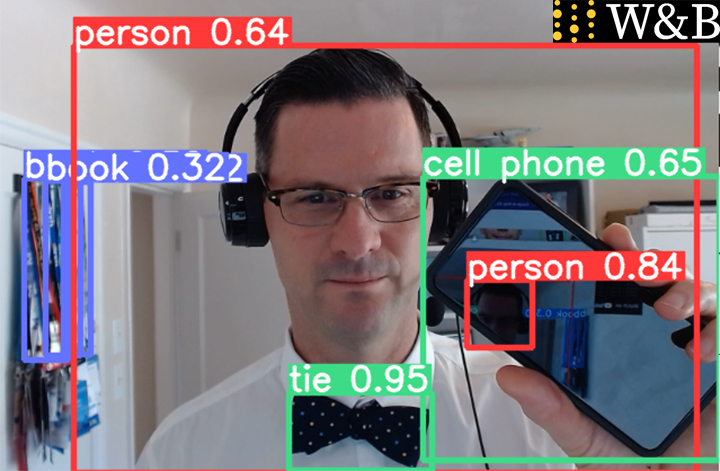
Creating Bounding Boxes With YOLO v5 On An Image
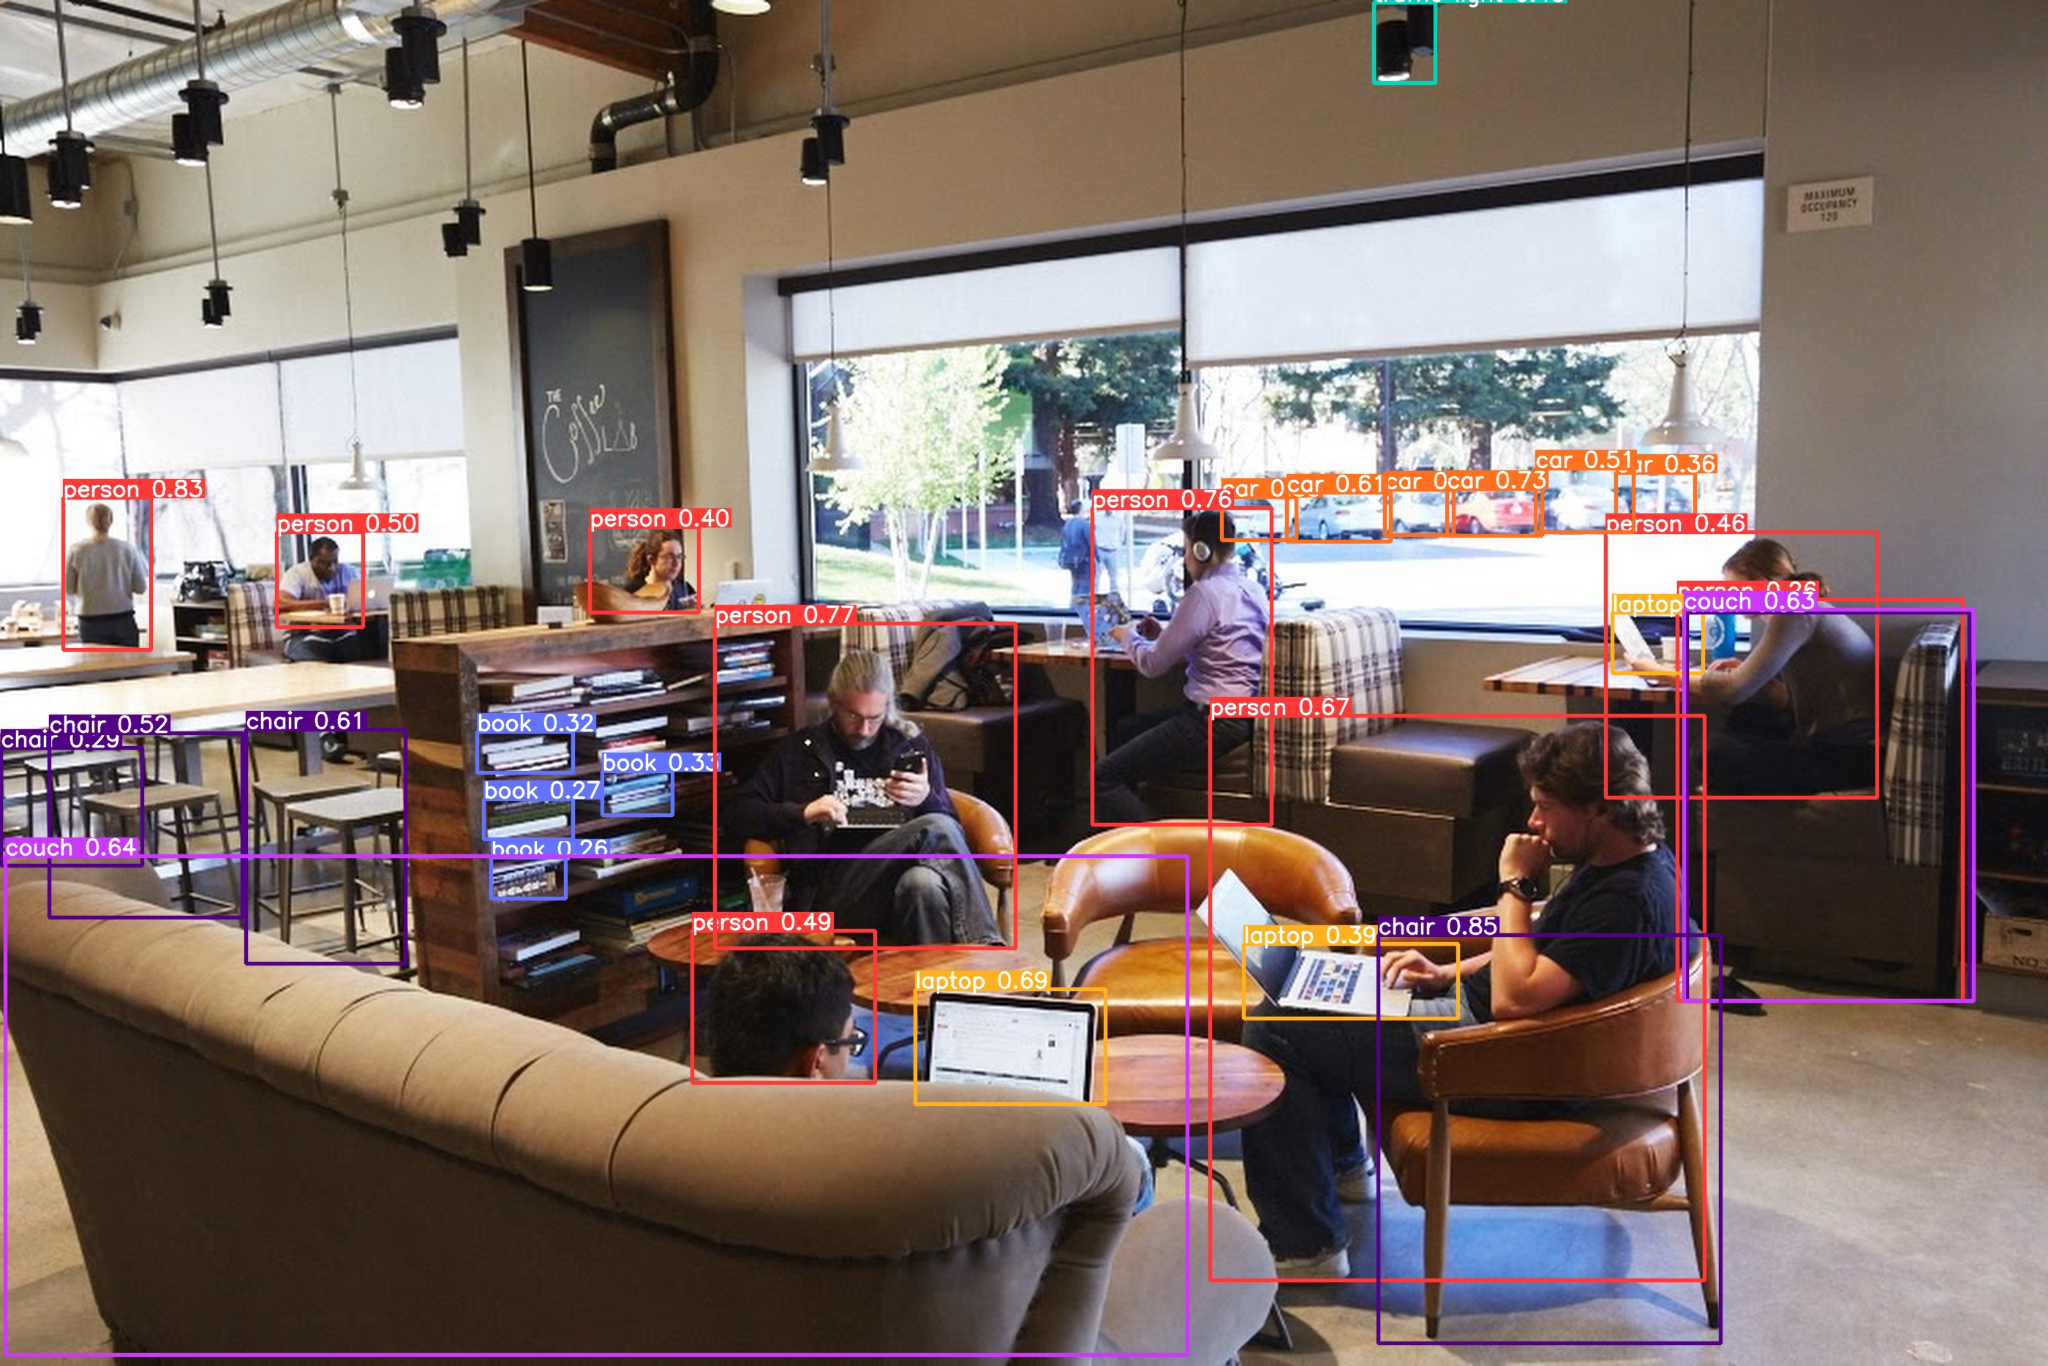
If you want to detect objects in a pre-existing image, simply place the image in a folder within the YOLO directory. I’ve created a directory names “images” inside my YOLO folder, and as an SEO I’ve taken a photo from Google’s media kit for our example here:
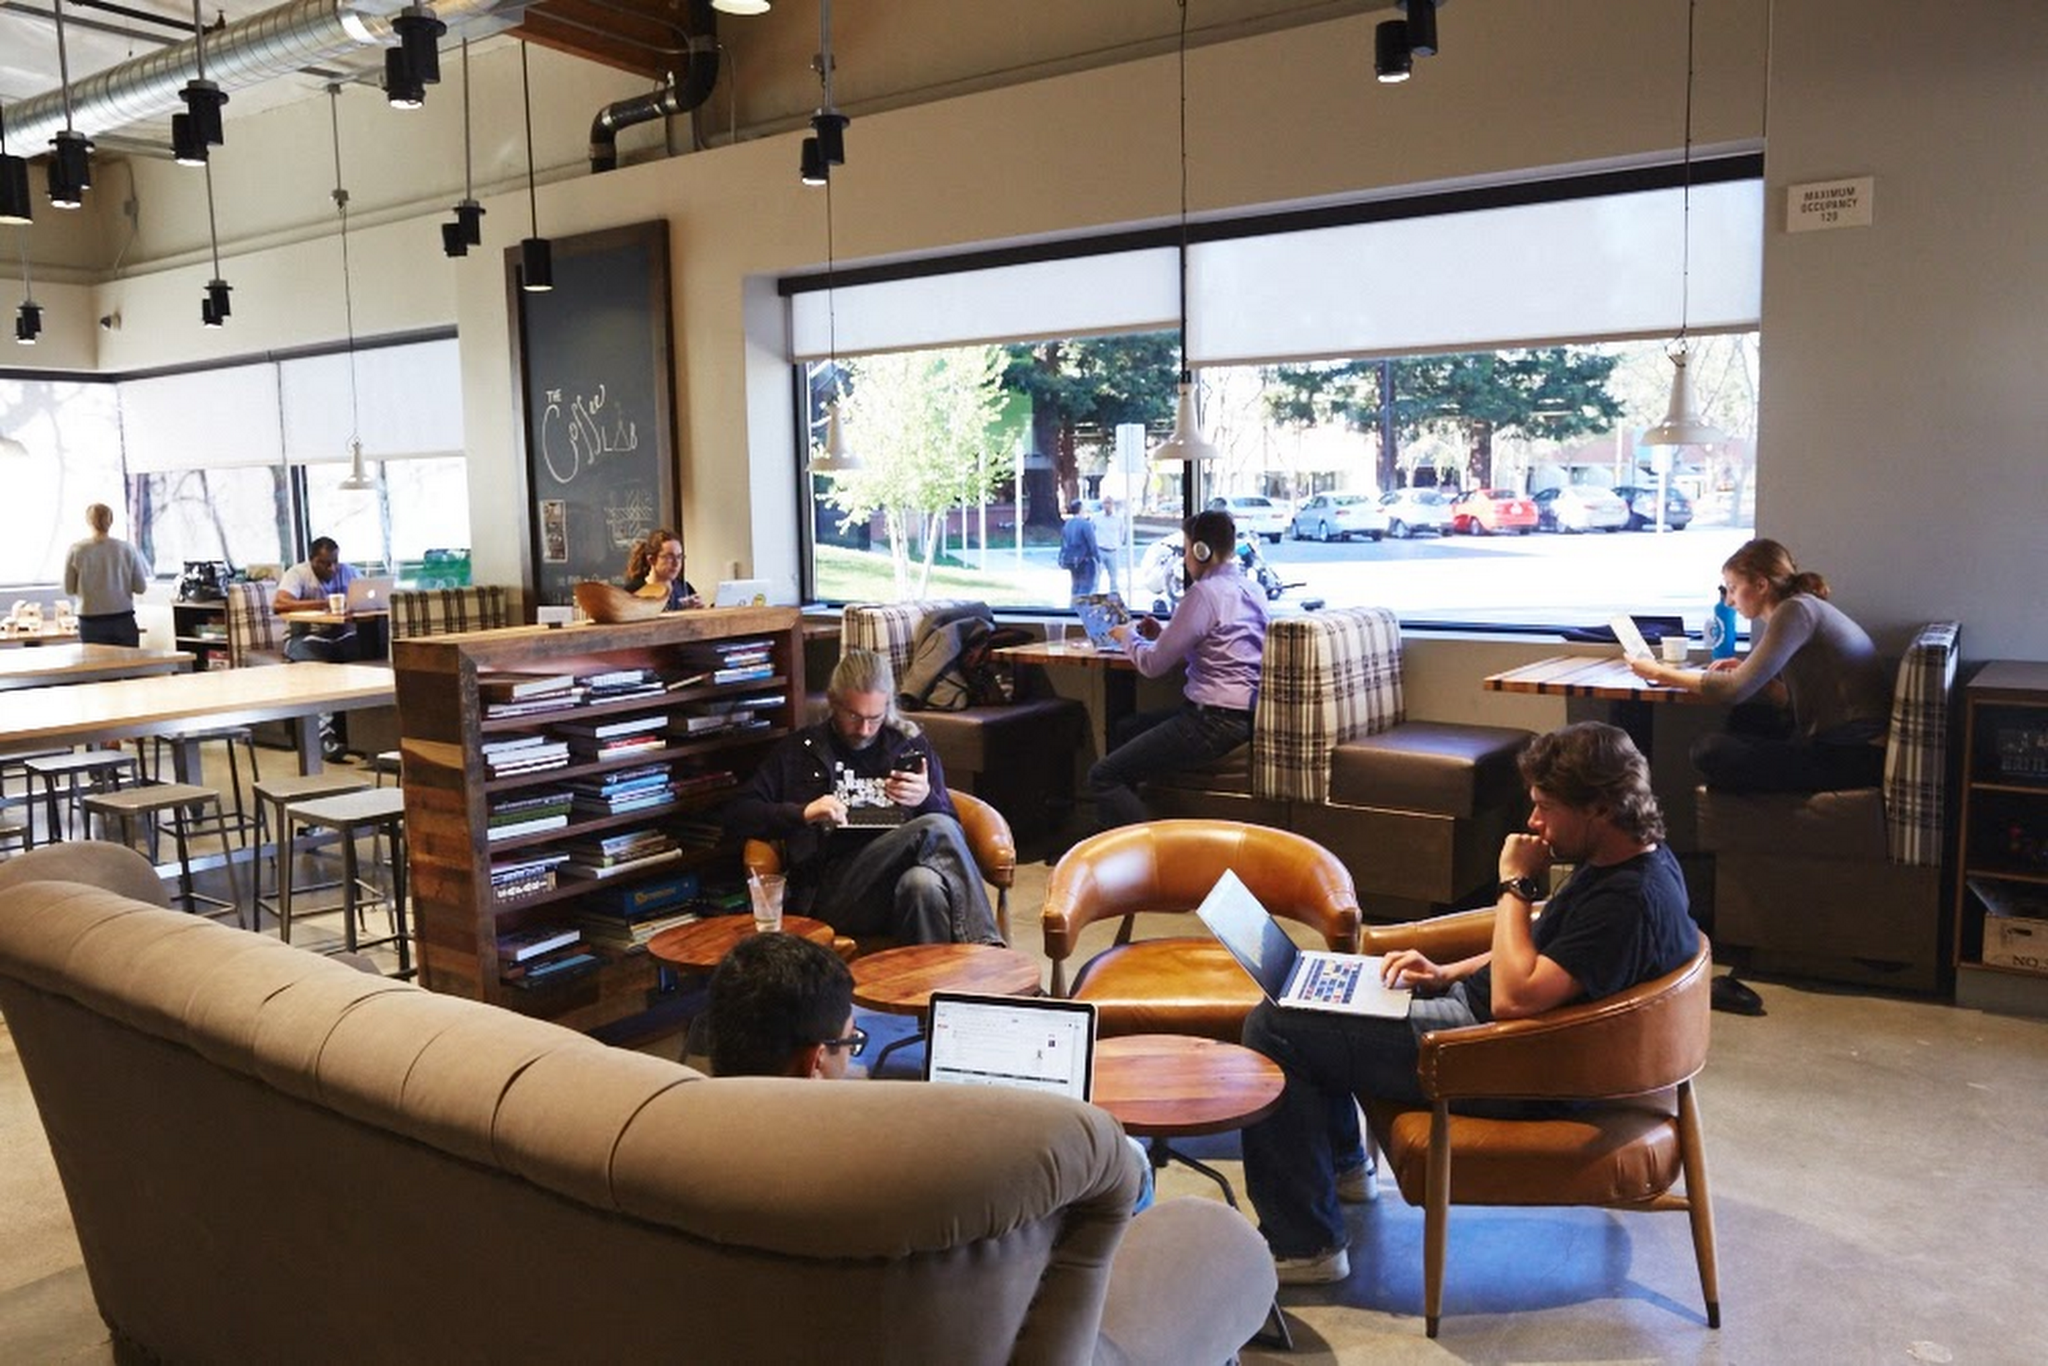
The Google CafeOpening up the YOLO console again, we enter:
python detect.py --source images/google.jpg
You’ll replace google.jpg with your own image name.After running it you’ll get something like:
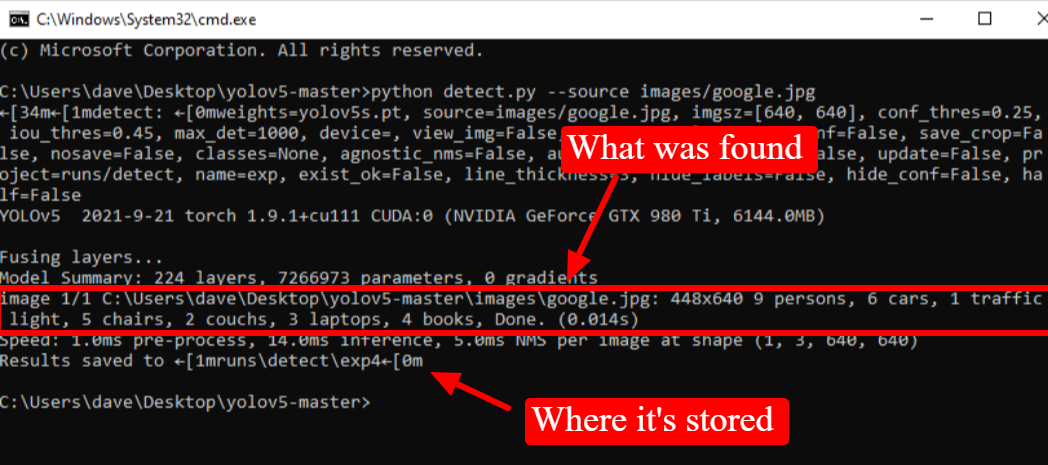
Go to the location it’s stored and …
Creating Bounding Boxes With YOLO v5 On A YouTube Video
Let’s say you want to create bounding boxes or just detect objects on a YouTube video.To do this we need to install a couple more modules into the YOLO directory.First, run:
pip install pafy
And then:
pip install youtube_dl
With these modules installed we can now open the console to the YOLO folder again and enter:
python detect.py --source https://youtu.be/jNQXAC9IVRw
You’ll again want to substitute the YouTube URL with your own. I simply picked the first YouTube video ever posted for my example. It turned into:

YOLO v5 Models, Sizes & Performance
By default YOLO used the smallest model as it’s lighter on processing requirements.. That’s the one we’ve been working with above.If you want to use larger models, which tend to need more processing power but are more accurate, you simply need to define that.Using the example above for object detection using our webcam, the default code was:
python detect.py --source 0
We can use any of the three other model sizes by simply adding the size to the end of the code to produce:Small (default)
python detect.py --source 0
Medium
python detect.py --source 0 --weights yolov5m.pt
Large
python detect.py --source 0 --weights yolov5l.pt
Largest
python detect.py --source 0 --weights yolov5x.pt
It’s always a trade-off of power vs performance.
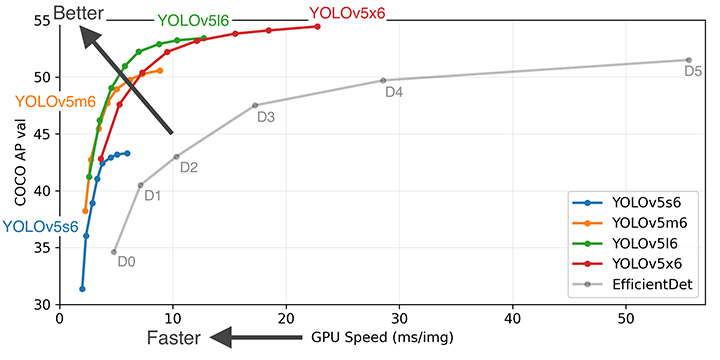
Source: PyTorch YOLO v5 Page
Object Detection With YOLO v5 Video Walkthrough
What you’ve been following along with above is a step-by-step breakdown of what subscribers to the Weights & Biases YouTube channel may be seen already. If you’re not yet subscribed to it, I suggest heading over and doing so now for more great tutorials, events and more.If you prefer following along to videos, here’s the one that W&B’s very entertaining Ivan Goncharov created that we’ve outlined above.
Yolo v5 Colab
You might not want to install the software, or you might just want to jump right to it.Either way, there’s a Colab ready for you.Worth noting, the Colab does not facilitate realtime object detection, so you won’t be able to set it up with you webcam, etc.A good place to start. 🙂Google Colab
Final Words
If you’re just starting down the path of machine learning, playing around with YOLO is an awesome place to start. And if you’re experienced in it, and expanding to include Computer Vision in your skills I hope you’ve found this a quick jumping off point.